15 min to read
The .github Folder for GitHub Copilot: Instructions, Prompts, Agents, Skills, Hooks, and MCP
How repository guidance layers work together for more consistent AI output

The .github folder is where repository-level GitHub Copilot guidance starts to become reusable, consistent, and team-friendly. If you want Copilot to follow shared standards instead of behaving differently in every chat, this is the folder you need to understand first.
Most people try to fix inconsistent Copilot output by writing longer prompts. That works for one session, but it does not scale across a repository. A better approach is to decide which rules belong in global instructions, which rules belong in scoped instruction files, which workflows belong in prompt files, and which advanced cases need agents, skills, hooks, or MCP.
What Is the .github Folder?
The .github folder is a repository-level location for shared project configuration and collaboration files. In a Copilot-enabled workflow, it often becomes the place where team guidance, reusable prompts, agent definitions, and automation rules live.
Not every file inside .github affects GitHub Copilot directly. Some files are for repository health and collaboration, such as issue templates, pull request templates, or CODEOWNERS. Others shape how Copilot behaves by giving it instructions, reusable prompts, role definitions, or tool integrations.
That difference matters. If you treat the entire folder as one generic config bucket, your guidance becomes noisy. If you organize it by purpose, Copilot becomes easier to steer and your repository becomes easier to maintain.
Which .github Files Affect GitHub Copilot?
This is the fastest working model:
| Layer | Main purpose | Loaded when | Best use | Common mistake |
|---|---|---|---|---|
copilot-instructions.md |
Global repository guidance | Every workspace chat request | Stable repo-wide rules | Putting every rule here |
.instructions.md files |
Scoped guidance | Matching files or relevant tasks | Folder, language, or area-specific rules | Using globs that are too broad |
.prompt.md files |
Reusable slash workflows | Manual invocation | Repeatable planning, review, or content tasks | Treating prompts like policy |
.agent.md files |
Role-based behavior | Agent selection or subagent invocation | Planner, implementer, reviewer workflows | Giving every agent every tool |
SKILL.md |
Reusable capability packs | Relevance match or explicit invoke | Deep reusable workflows with resources | Writing vague skill descriptions |
| hook config files | Deterministic automation | Lifecycle events | Safety checks and enforced validation | Running unreviewed scripts |
mcp.json |
External tools and resources | After trust and startup | GitHub, browsers, APIs, and external systems | Adding servers without scope review |
Think of these layers as a progression from guidance to enforcement.
- Instructions shape what Copilot should prefer.
- Prompts structure repeated workflows.
- Agents and skills package reusable operating models.
- Hooks and MCP execute or expose concrete capabilities.
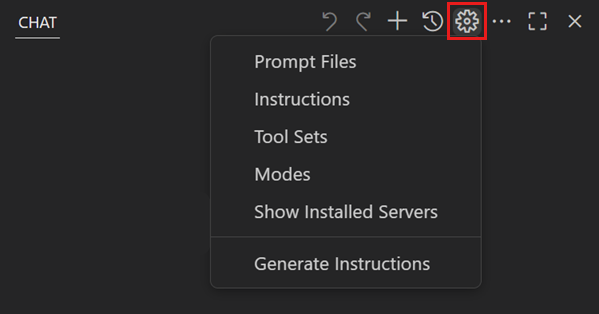 Image source: VS Code documentation (Microsoft).
Citation capsule: VS Code documents instructions, prompts, agents, skills, hooks, and MCP as separate customization systems with different loading behavior and responsibilities. Source: GitHub Copilot customization overview.
When Should You Use copilot-instructions.md?
Use .github/copilot-instructions.md for the small set of rules that should apply almost everywhere in the repository.
Good examples:
- require tests for bug fixes
- avoid hardcoded credentials
- keep changes minimal and scoped
- follow repository naming conventions
A strong global instruction file feels boring in a good way. It should not try to describe every folder, language, framework, and workflow. It should only hold the rules that are stable enough to deserve workspace-wide scope.
A simple example looks like this:
# Repository Copilot Rules

- Add tests for behavior changes.
- Do not bypass auth or validation checks.
- Avoid new dependencies unless justified.
- Keep edits minimal and aligned with existing patterns.
As the repository grows, the most important discipline is subtraction. If a rule only applies to API files, React files, or docs, it probably does not belong here.
Citation capsule:
.github/copilot-instructions.mdis applied for workspace chat requests. Source: Use custom instructions in VS Code.
When Should You Use Scoped Instruction Files?
Use .github/instructions/*.instructions.md when a rule should apply only to a particular part of the repository.
That usually means:
- API rules for backend folders
- UI rules for frontend folders
- markdown or docs rules for content folders
- test conventions for test files
A common example is a backend API instruction file:
---
description: Backend API standards
applyTo: "src/api/**/*.ts"
---

Use typed request and response contracts.
Return stable error codes.
Do not access database clients directly in controllers.
The critical detail is applyTo. That pattern decides where the rule becomes active.
Quick example:
src/api/*.tsmatches only direct files undersrc/apisrc/api/**/*.tsmatches nested files too
This is where many repositories get noisy. If your pattern is too broad, scoped guidance starts acting like global policy. If the pattern is too narrow, the guidance never triggers when you need it.
Use scoped instructions to keep the global layer short. That single decision improves maintainability more than most prompt tuning.
Citation capsule:
.instructions.mdsupportsapplyTofrontmatter and relevance-based application. Source: Use custom instructions in VS Code.
When Do Prompt Files Work Better Than Instructions?
Use prompt files when you repeat the same task structure often enough that rewriting it in chat becomes wasteful.
Prompt files are good for workflows like:
- creating implementation plans
- researching a topic
- reviewing a change set
- drafting structured content
- verifying a checklist before publish or merge
A prompt file is not the same as policy. It is a reusable task entry point.
Example:
---
description: Break requirement into implementation tasks
---

Given a requirement, output:
1. assumptions
2. ordered tasks
3. risks
4. validation checklist
That works well when you want repeatable output shape without creating a persistent agent persona.
Common location:
.github/prompts/*.prompt.md
Citation capsule: Prompt files are manually invoked slash commands and are separate from auto-applied instructions. Source: Use prompt files in VS Code.
When Do Custom Agents Actually Help?
Custom agents help when the same repository needs distinct roles with different responsibilities and tool access.
The simplest useful split is often:
- planner: reads, searches, and breaks work into tasks
- implementer: edits files and validates changes
- reviewer: reads changes and looks for risk, regressions, and missing tests
A planner should not have the same behavior as an implementer. A reviewer should not behave like a code generator. Custom agents let you separate those roles explicitly.
Example:
---
name: planner
description: Generate implementation plans before coding
tools: ["search", "read_file"]
handoffs:
  - label: Start Implementation
    agent: implementer
    prompt: Implement the approved plan with tests.
---

You are a planning specialist. Produce implementation tasks with risk notes.
This becomes especially useful in team repositories where the same workflow repeats often and role confusion creates avoidable churn.
Common location:
.github/agents/*.agent.md
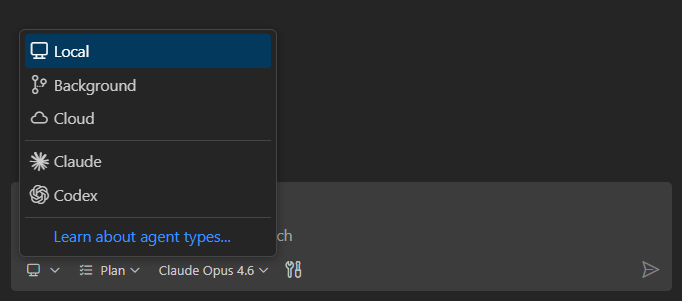 Image source: VS Code documentation (Microsoft).
Citation capsule: Custom agents in
.agent.mdcan define role instructions, tool access, and handoffs. Source: Custom agents in VS Code.
Why Do Skills Scale Better Than Giant Prompts?
A skill is closer to a reusable capability pack than a plain block of guidance. It can include instructions, supporting templates, scripts, and extra resources.
That makes skills useful for workflows such as:
- Git workflow standards
- debugging playbooks
- deployment checklists
- API integration patterns
- review or verification routines
A simple skill layout might look like this:
.github/skills/git-workflow/
  SKILL.md
  templates/
  scripts/
Skills also scale well because loading is progressive.
- metadata is discovered first
- full skill content is loaded when relevant or explicitly invoked
- extra resources are loaded only when referenced
That helps large repositories avoid stuffing every detailed instruction into every chat.
Common location:
.github/skills/<skill-name>/SKILL.md
Citation capsule: Skill metadata limits are strict (
namemax 64 chars,descriptionmax 1024 chars), supporting context efficiency. Source: Use Agent Skills in VS Code.
When Should Hooks Enforce Policy?
Hooks are useful when you want enforcement instead of suggestion.
That is the key difference.
Instructions tell Copilot what to prefer. Hooks run commands when lifecycle events fire.
Typical use cases:
- block dangerous commands before execution
- run lint or tests after a tool action
- write audit logs
- add deterministic safety checks
Example:
{
  "hooks": {
    "PreToolUse": [
      {
        "type": "command",
        "command": "./scripts/block-dangerous-commands.sh"
      }
    ],
    "PostToolUse": [
      {
        "type": "command",
        "command": "npm run lint"
      }
    ]
  }
}
This layer is powerful, which is why it needs ownership. Review scripts carefully, keep them short, and only enforce checks you are actually willing to maintain.
Common location:
.github/hooks/*.json
Citation capsule: Hooks support lifecycle events, default timeout is 30 seconds, and exit code
2is treated as blocking. Source: Agent hooks in VS Code.
How Does MCP Fit Into the .github Story?
MCP connects Copilot to external systems such as APIs, browsers, GitHub services, or test tooling. It is not just more instructions. It is a trust boundary and an execution boundary.
That means the right question is not only “Can I add this server?” but also “Should this repository trust this server, and what exactly should it expose?”
Example:
{
  "servers": {
    "github": {
      "type": "http",
      "url": "https://api.githubcopilot.com/mcp"
    },
    "playwright": {
      "command": "npx",
      "args": ["-y", "@microsoft/mcp-server-playwright"]
    }
  }
}
Good MCP hygiene means:
- verify server ownership
- avoid hardcoded credentials
- expose only the minimum useful capability
- review whether the server belongs at workspace scope or user scope
Common workspace config:
.vscode/mcp.json
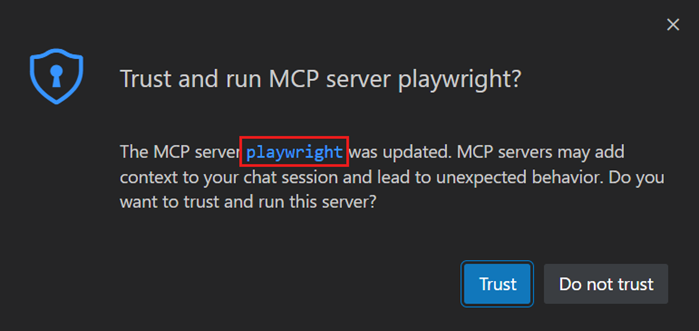 Image source: VS Code documentation (Microsoft).
Citation capsule: MCP in VS Code supports workspace and user-profile scopes with explicit trust prompts. Source: Add and manage MCP servers in VS Code.
Which File Should You Use?
If you are choosing between layers, use this rule of thumb:
- use
copilot-instructions.mdfor stable repository-wide rules - use
.instructions.mdfiles for folder-specific or language-specific rules - use
.prompt.mdfiles for repeatable chat workflows - use
.agent.mdfiles for role-based workflows with tool boundaries - use
SKILL.mdfor reusable capability packs with supporting resources - use hooks for deterministic safeguards
- use MCP when external tools materially improve the workflow
This section matters for SEO and answer retrieval because it maps directly to how people search:
- which file should I use for GitHub Copilot instructions?
- prompt files vs agents
- when should I use skills or hooks?
What Should a Clean .github Layout Look Like?
A practical repository layout might look like this:
.github/
  copilot-instructions.md
  instructions/
    backend.instructions.md
    frontend.instructions.md
    docs.instructions.md
  prompts/
    plan.prompt.md
    verify.prompt.md
  agents/
    planner.agent.md
    reviewer.agent.md
  skills/
    git-workflow/
      SKILL.md
      templates/
      scripts/
  hooks/
    safety.json
This layout is not mandatory, but it reflects a useful principle: one concern per layer.
The more duplicated guidance you carry across layers, the harder it becomes to understand why Copilot behaved a certain way.
How Can You Learn From awesome-copilot and copilot-team-workflow?
Two repositories are especially useful for understanding how these ideas look in practice.
Use them differently.
awesome-copilot is useful for breadth. It helps you see multiple patterns for instructions, prompting, skills, and customizations across real examples.
copilot-team-workflow is useful for operating discipline. It shows how a repository can encode phase gates, structured workflows, and role separation so that Copilot becomes part of a repeatable team process rather than a free-form helper.
A practical way to study both repos is this:
- collect instruction patterns from
awesome-copilot - collect workflow and phase patterns from
copilot-team-workflow - map both into your own repository with one owner per rule
- test the setup on one real feature flow from planning to verification
What Mistakes Create Conflicting AI Guidance?
These are the mistakes that usually reduce output quality fastest:
- putting all guidance into one giant global file
- using prompt files as policy instead of reusable workflows
- giving every agent broad tool access
- writing
applyTopatterns that match almost everything - creating vague skills that do not match relevant tasks clearly
- running unreviewed hook scripts
- enabling MCP servers without trust or scope review
Most of these problems are really ownership problems. If a rule exists in three different places, nobody knows which layer should be edited when behavior drifts.
Troubleshooting Checklist
Always-On File Ignored
- verify exact path:
.github/copilot-instructions.md - reload VS Code after creation
- confirm the workspace is trusted
Scoped Rules Not Triggering
- verify the
applyTopattern against the actual folder structure - check whether the files are in active context
- avoid globs that are too broad or too narrow
Prompt Not Visible
- ensure the file is under
.github/prompts/ - confirm the
.prompt.mdextension - verify prompt metadata is valid
Hook Fails Unexpectedly
- verify the command exists
- confirm the script exits intentionally
- check for timeout behavior
MCP Tool Not Available
- validate
.vscode/mcp.jsonsyntax - approve the trust prompt
- confirm the server process can actually start
FAQ
What is the .github folder used for?
The .github folder stores repository-level collaboration and configuration assets. In a Copilot workflow, it can also hold instructions, prompt files, custom agents, skills, and related automation.
Does GitHub Copilot read every file inside .github?
No. Different files affect Copilot in different ways, and some .github files are unrelated to Copilot behavior. The important question is which layer applies to guidance, workflow, or integration.
What is the difference between copilot-instructions.md and .instructions.md?
copilot-instructions.md applies globally. .instructions.md files apply conditionally based on file or task relevance.
When should I use a prompt file instead of a custom agent?
Use a prompt file for a reusable one-shot workflow. Use a custom agent when you need persistent role behavior, tool constraints, or handoffs.
Are skills better than prompts?
Not automatically. Prompts are great for task entry points. Skills are better when you need a reusable capability that includes deeper guidance and supporting resources.
Is MCP required for a good Copilot setup?
No. Many repositories get strong results with instructions, prompt files, and clear workflows alone. Use MCP when external tools or resources add clear value.
What Should You Implement This Week?
- Add or simplify
.github/copilot-instructions.md. - Add one scoped
.instructions.mdfile for your highest-impact folder. - Convert one repeated workflow into a
.prompt.mdfile. - Add a custom agent only if you already have distinct workflow roles.
- Add one hook only if you have a safety check worth enforcing.
- Add MCP only for trusted, clearly useful integrations.
Key Takeaways
- The
.githubfolder matters because it turns one-off Copilot guidance into reusable repository behavior. - Global instructions should stay short.
- Scoped instructions should be precise.
- Prompt files should structure repeated workflows.
- Agents, skills, hooks, and MCP should be added deliberately, not just because they exist.
- The cleanest repositories give each rule one clear home.
Related Guides
If you want a practical follow-up path after this architecture guide, these Copilot CLI posts are good next reads:
- Introduction to Copilot CLI
- Copilot CLI Getting Started
- Copilot CLI vs Copilot Chat
- Copilot CLI Troubleshooting
- Copilot CLI Advanced Usage
- Copilot CLI Project Build Series
References
Official Documentation
- VS Code custom instructions
- VS Code prompt files
- VS Code custom agents
- VS Code agent skills
- VS Code hooks
- VS Code MCP servers
- GitHub custom instructions
- GitHub repository instructions
- GitHub agent skills
- GitHub custom agents
- GitHub MCP context
